.post-body img { max-width:600px; max-height:auto; }

Pages

Showing posts with label centerpiece. Show all posts

DIY centerpiece: Falling Leaves

Monday, September 24, 2012

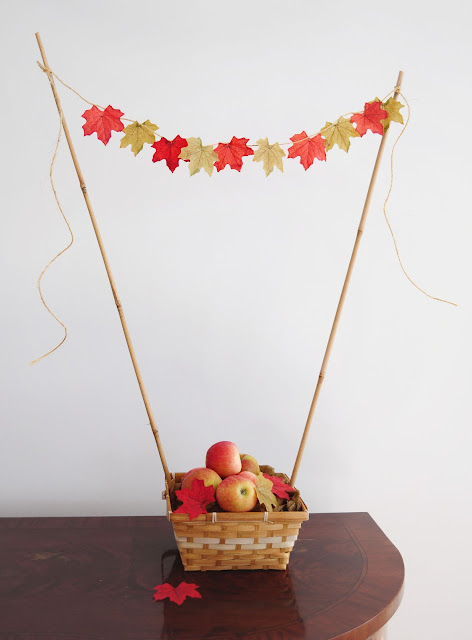
apple basket centerpiece

Apples and colorful falling leaves are the hallmarks of autumn (see my Apple Orchard post here).  Here's a simple DIY centerpiece idea that would look beautiful at any fall occasion!

This is what you will need:

6-foot bamboo garden stakes (1 per centerpiece, you can get them at Home Depot)
bushel baskets or natural color baskets (I was lucky to find mine at the dollar store!)
a bag of autumn leaves (also from the dollar store, or from the silk florals section at your local craft store)
heavy duty clear packing tape
jute twine (for a rustic look, but you can use any kind you like)
needle and thread
newspaper (to fill up the basket, if needed)
brown crepe paper
apples (I used about 6 per basket, but you can use more)

And these are the steps:
Cut the bamboo stakes in half so that you have 2 equals lengths.
Securely tape them to either side of the basket - they should be resting on the bottom of the basket. Move the basket around a bit to make sure they hold up well!
If you are not going to be filling the entire basket with apples, fill the bottom of the basket with newspaper first and then tuck in a layer of brown crepe paper to cover.


For the leaf garland, pass a needle and thread through the bottom of each leaf and tie onto the jute twine.  I used 10 leaves per garland.


To finish, tie the garland onto the stakes, fill the basket with apples, and scatter a few leaves over them for a natural look.

DIY Handbag Centerpieces

Tuesday, August 21, 2012

purse centerpiece

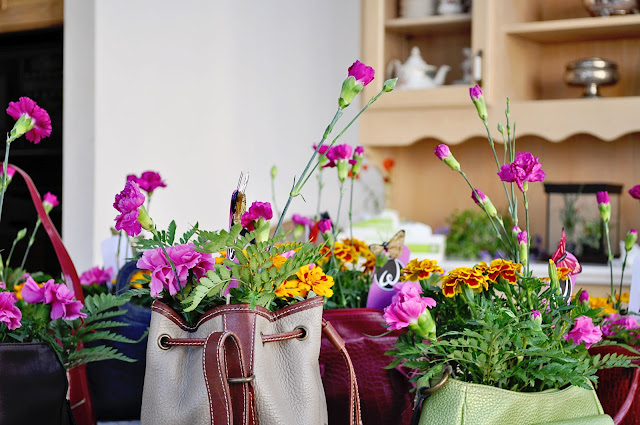
Today I thought I would post this centerpiece idea, which I did for an event back in June.  It's easy to do and is perfect for an ladies' lunch, afternoon tea party, or bridal shower.  For each centerpiece, you'll need a handbag, a gallon size Ziploc bag, and a potted plant about the size of the handbag (I chose marigolds).  I made the centerpieces using handbags donated for the event, but you can pick up inexpensive ones at a thrift store. The best ones to choose are those with a flat bottom, as they sit better on a table top.

Depending on how full you want your arrangement to look and how many centerpieces you need, you will also need a bouquet or two of cut flowers and some greens.  I used carnations, as they seem to be quite hardy, and a bunch of ferns.  Finally, you will need a watering can with a long spout.

To make the centerpieces, simply put the potted plant into the Ziploc bag and place it into the handbag.  Tuck in the plastic bag if it is sticking over the edges.  Then cut the flowers from your bouquet at varied heights and gently push the stems into the soil of the potted plant.  Same with the ferns.  Make sure that the stems are secure in the soil so they don't move around or fall out of the arrangement.  Once you are finished, take care watering the soil with the watering can - the plastic bag should prevent any leaks, but just make sure the water is going directly into the pot, and don't overwater.

To finish it off, I hot glued a tag with a logo to a wooden dowel, then added a butterfly to make it look like it just came in from the garden!  You could customize the tag with a table number or whatever else you like, or just skip this step entirely.  Either way they're so lovely!

handbag centerpiecepurse centerpiece


Proudly designed by Mlekoshi playground